The self-adhesive wet-laid waterproofing membrane is reinforced with a polyester fiber mat or high-performance polymer base material. Both sides are coated with advanced self-adhesive modified bitumen to ensure strong and durable bonding performance.
The lower surface is protected with a silicone-coated release film or release paper, while the upper surface is finished with a silicone release film or polyethylene film. This structure creates a stable separation layer designed specifically for wet-application installation.

1. Wet-Laid Installation Principle
Wet-laid installation refers to applying the membrane directly onto a damp (not fully dry) substrate. No drying of the base layer is required. The membrane bonds firmly with the damp cementitious surface, forming a continuous waterproofing layer.
2. Reinforcement Types
Products are classified based on reinforcement materials:
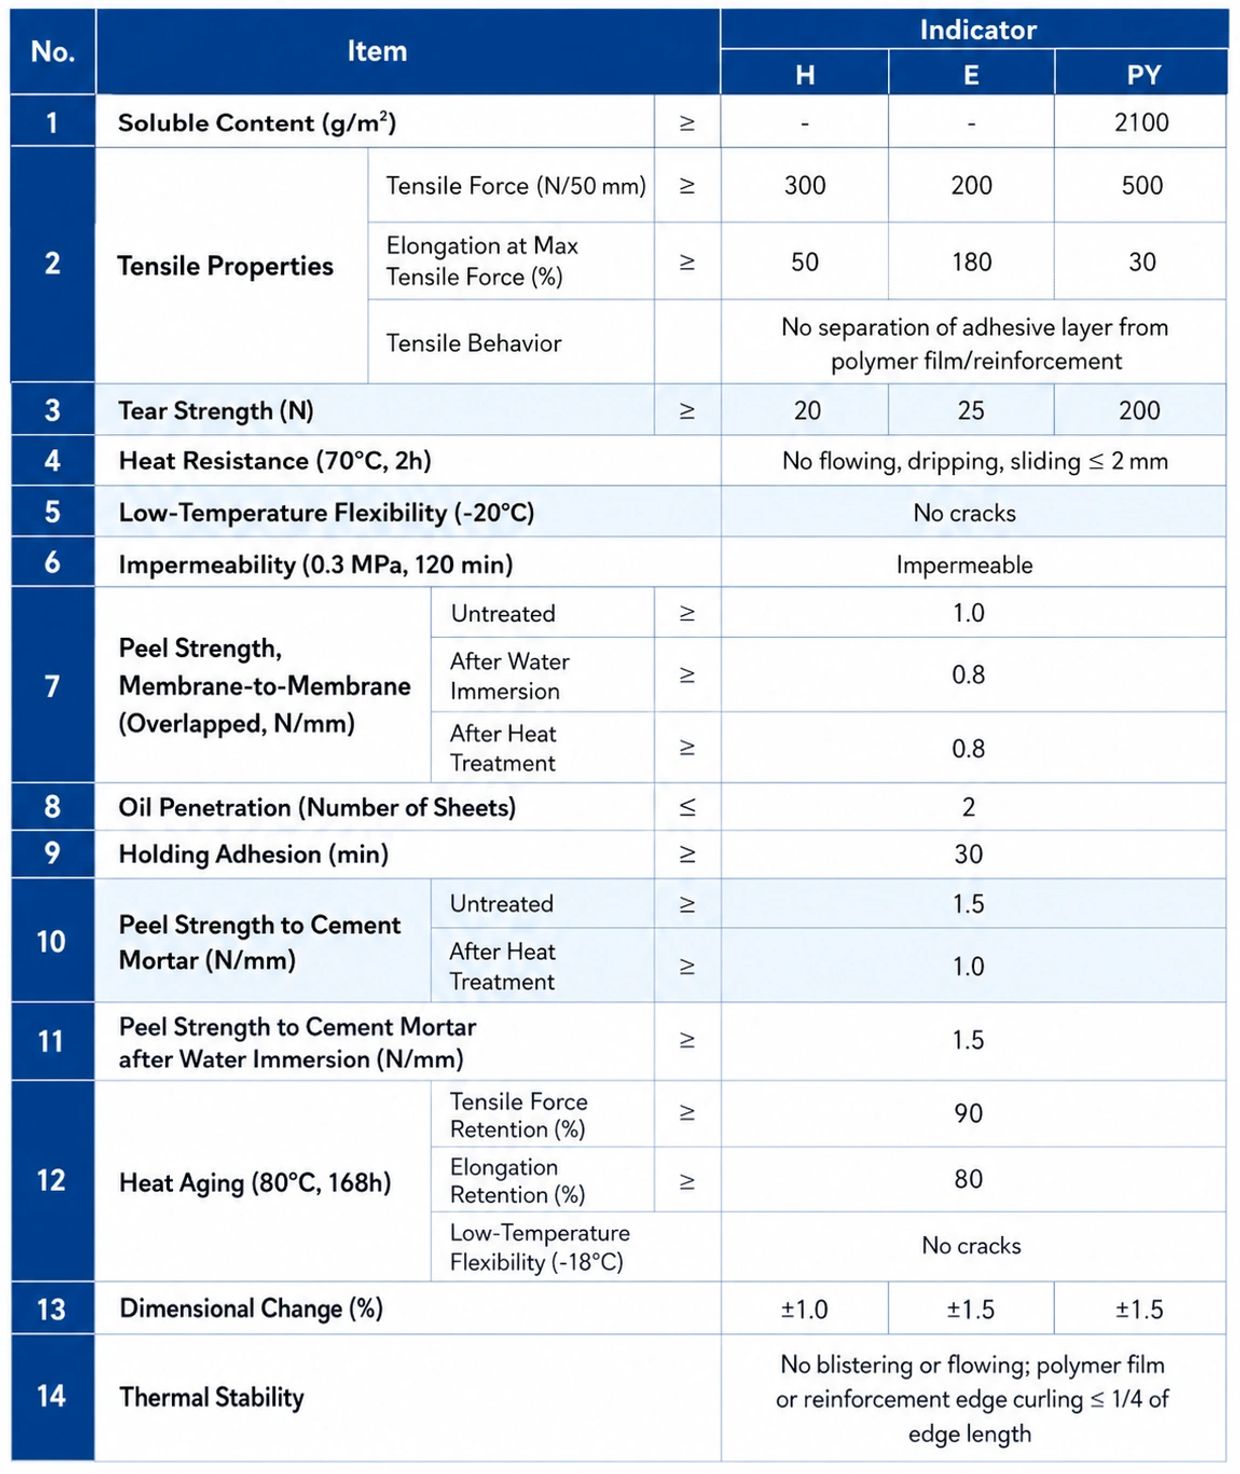
Polymer-based membranes are further divided into:
In these structures, the polymer layer may be positioned on the surface or embedded within the membrane for optimized performance.
3. Bonding Surface Types
4. Thickness Options
The wet-laid membrane is mainly used for non-exposed waterproofing systems, where it is bonded to cement mortar or similar substrates.
Typical applications include:
For optimal performance, membrane overlaps should be sealed using self-adhesive joint technology.
Implementation Standard: GB/T 35467-2017
System Workflow
Substrate Cleaning → Surface Wetting (skip if already damp) → Positioning & Baseline Marking → Cement Slurry Mixing & Application → Membrane Installation → Air Removal (Slurry Rising & Venting) → Overlap Joint Sealing → Termination & Edge Sealing → Inspection & Acceptance
Preparation includes all necessary materials, accessories, substrate evaluation, site readiness, and technical planning to ensure proper installation.
The substrate must be:
If the substrate is dry, lightly pre-wet the surface. If it is already damp, this step may be skipped.
Carry out accurate baseline marking to ensure proper alignment of the membrane and consistent overlap during installation.
Apply a uniform layer of cement mortar (approximately 2–3 mm thick, adjusted according to substrate flatness) over the prepared surface.
Use a wooden float or rubber roller to gently press the membrane surface, removing trapped air beneath it.
This ensures full contact and strong bonding between the membrane and cement slurry.
Allow the installed membrane system to cure for approximately 48 hours, depending on ambient temperature and site conditions. Avoid disturbance or load during curing.
All membrane edges, terminations, and junctions must be sealed in accordance with design requirements and relevant waterproofing standards.
Final inspection should confirm:
We use cookies to analyze website traffic and optimize your website experience. By accepting our use of cookies, your data will be aggregated with all other user data.